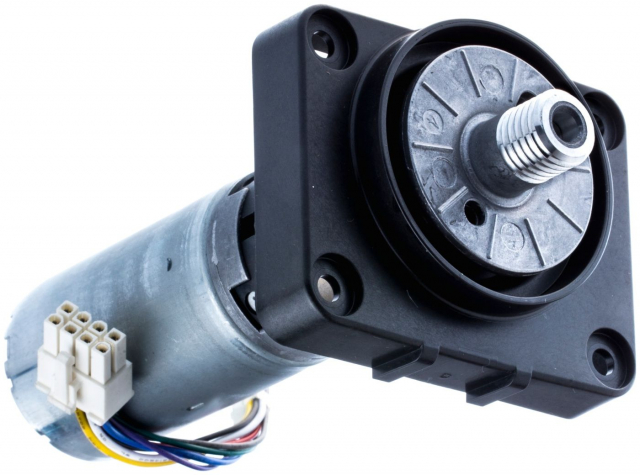
Here is a step by step guide of how to disassemble and replace the wheel motor on the Husqvarna Automower. This guide applies to Automowers 320, 330X, 420, 430X, 440 and 450X. A faulty wheel motor can often generate the error code "Wheel motor blocked" or you notice that the robot goes in circles because only one motor is operational. Before starting to change the wheel motor, you should ensure that it's actually the motor that is at fault, as a damaged motherboard could be the cause of the problem. For example, if you see the error code "Right wheel motor blocked", you can try moving the right wheel motor to the left side (or vice versa). If the error is still present on the right side, the most likely cause is a defective motherboard, so replacing the drive motor will not fix the error.
At the bottom of the page there is a list of the spare parts needed to do the job.
Tools we use: Torx screwdriver T20, ring spanner size 24.
-(1).jpg) Step 1: Turn your Automower over and disconnect the power cable. First remove the rubber cap; then disassemble the charging connector. Step 1: Turn your Automower over and disconnect the power cable. First remove the rubber cap; then disassemble the charging connector. | .jpg) Step 2: Turn your Automower over and disconnect the power cable. First remove the rubber cap; then disassemble the charging connector. Step 2: Turn your Automower over and disconnect the power cable. First remove the rubber cap; then disassemble the charging connector. |
-(1).jpg) Step 3: Unscrew all the screws around the chassis. 14 in total. | .jpg) Step 4: Lift up the top of the chassis. Disconnect the long flat white connector that goes to the motherboard according to the yellow marking. Put the bottom part of the chassis to the side. |
.jpg) Step 5: Disconnect the wheel motor connector from the motherboard as marked. | .jpg) Step 6: Stand the robot up vertically, remove the hub cap and use a ring spanner size 24 or adjustable spanner to loosen the nut. |
.jpg) Step 7: Remove the wheel from the wheel motor shaft. Unscrew the four screws that keep the wheel motor in place. | .jpg) Step 8: Remove the drive motor from its place. |
.jpg) Step 9: Place the new wheel motor in its place. Screw in the four screws. | .jpg) Step 10: Replace the washer and nut and tighten the nut securely. |
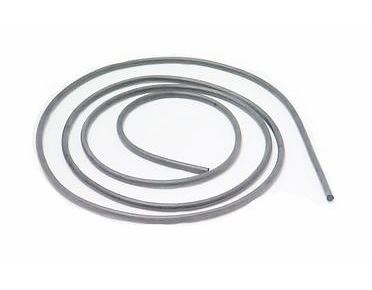
.jpg) Step 11: Replace the hub cap. | .jpg) Step 12: Connect the connector from the wheel motor to the robot's motherboard according to the marking. Change the sealing strip in the under chassis at the same time to avoid damage caused by damp. |
.jpg) Step 13: Get out the lower part of the chassis and connect the flat lead from the upper part to the motherboard accoding to the markings. | -(1).jpg) Step 14: Screw back all 14 screws around the chassis. |
-(1).jpg) Step 15: Put the chassis on the robot by placing it on all four points simultaneously. Finally, connect the charging cable and press the rubber plug back into the lower part of the chassis. Step 15: Put the chassis on the robot by placing it on all four points simultaneously. Finally, connect the charging cable and press the rubber plug back into the lower part of the chassis. |
Make sure the wheel can rotate freely. Now you can use your Automower again.
Here is a step by step guide of how to disassemble and replace the wheel motor on the Husqvarna Automower. This guide applies to Automowers 320, 330X, 420, 430X, 440 and 450X. A faulty wheel motor can often generate the error code "Wheel motor blocked" or you notice that the robot goes in circles because only one motor is operational. Before starting to change the wheel motor, you should ensure that it's actually the motor that is at fault, as a damaged motherboard could be the cause of the problem. For example, if you see the error code "Right wheel motor blocked", you can try moving the right wheel motor to the left side (or vice versa). If the error is still present on the right side, the most likely cause is a defective motherboard, so replacing the drive motor will not fix the error.
At the bottom of the page there is a list of the spare parts needed to do the job.
Tools we use: Torx screwdriver T20, ring spanner size 24.
-(1).jpg) Step 1: Turn your Automower over and disconnect the power cable. First remove the rubber cap; then disassemble the charging connector. Step 1: Turn your Automower over and disconnect the power cable. First remove the rubber cap; then disassemble the charging connector. |
.jpg) Step 2: Detach the chassis. You do this by holding the lawnmower as shown in the picture and using your right hand to pull the chassis upwards. It's attached by two points on the back and two on the front. Step 2: Detach the chassis. You do this by holding the lawnmower as shown in the picture and using your right hand to pull the chassis upwards. It's attached by two points on the back and two on the front. |
-(1).jpg) Step 3: Unscrew all the screws around the chassis. 14 in total. |
.jpg) Step 4: Lift up the top of the chassis. Disconnect the long flat white connector that goes to the motherboard according to the yellow marking. Put the bottom part of the chassis to the side. |
.jpg) Step 5: Disconnect the drive motor connector from the motherboard as marked. |
.jpg) Step 6: Stand the robot up vertically, remove the hub cap and use a ring spanner size 24 or adjustable spanner to loosen the nut. |
.jpg) Step 7: Remove the running wheel from the wheel motor shaft. Unscrew the four screws that keep the wheel motor in place. |
.jpg) Step 8: Remove the wheel motor from its place. |
.jpg) Step 9: Place the new wheel motor in its place. Screw in the four screws. |
.jpg) Step 10: Replace the washer and nut and tighten the nut securely. |
.jpg) Step 11: Replace the hub cap. |
.jpg) Step 12: Connect the connector from the wheel motor to the robot's motherboard according to the marking. Change the sealing strip in the under chassis at the same time to avoid damage caused by damp. |
.jpg) Step 13: Get out the lower part of the chassis and connect the flat lead from the upper part to the motherboard accoding to the markings. |
-(1).jpg) Step 14: Screw back all 14 screws around the chassis. |
-(1).jpg) Step 15: Put the chassis on the robot by placing it on all four points simultaneously. Finally, connect the charging cable and press the rubber plug back into the lower part of the chassis. Step 15: Put the chassis on the robot by placing it on all four points simultaneously. Finally, connect the charging cable and press the rubber plug back into the lower part of the chassis. |
Make sure the wheel can rotate freely. Now you can use your Automower again.


 Help center is a digital DIY manual for Husqvarna Automower robotic lawnmower. We teach you how to change batteries, circuitboards and other spare parts on your Husqvarna Automower.