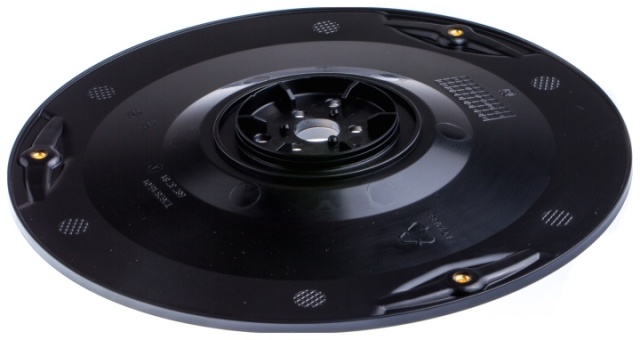
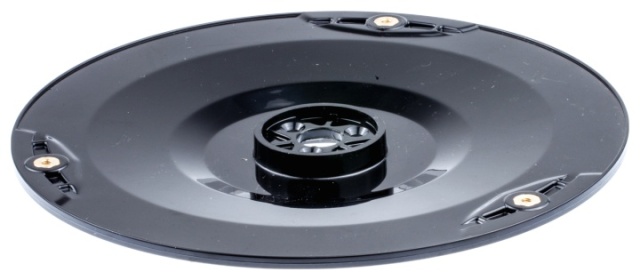
Change the blade disc on Husqvarna Automower 320, 330X, 420, 430X, 440 and 450X
Here is a step by step guide of how to disassemble and replace the blade disc on the Husqvarna Automower 320, 330X, 420, 430X, 440 and 450X.
A cracked or damaged blade disc causes an imbalance in the cutting system, resulting in missing blades or noise from the robotic lawnmower. Another common fault is that a threaded insert for a blade on the disc has come loose. It's also important to change the blade disc .
Changing the blade disc is a simple process and doesn't require any special tools. See below for step by step instructions.
At the bottom of the page there is a list of the spare parts needed for the job.
Tools we use: Torx screwdriver T20, Allen key size 5.
.jpg) Step 1: Turn your Automower over. Unscrew the three screws. Step 1: Turn your Automower over. Unscrew the three screws. | .jpg) Step 2: Lift off the skid plate and its cover. Unscrew the marked centre screw with an allen key. Hold the blade disc in place so it doesn't rotate. Step 2: Lift off the skid plate and its cover. Unscrew the marked centre screw with an allen key. Hold the blade disc in place so it doesn't rotate. |
.jpg) Step 3: Lift out the bearing holder and unscrew the three marked screws holding the blade disc. | .jpg) Step 4: Lift up the blade disc to loosen it from the lawnmower engine's axle . Carefully fit the new blade disc onto the blades before putting it back on the shaft. |
.jpg) Step 5: Screw in the three marked screws holding the blade disc. | .jpg) Step 6: Put the bearing holder back and screw in the centre screw. Step 6: Put the bearing holder back and screw in the centre screw. |
.jpg) Step 7: Put the blade disc and the lid back on and screw in the three marked screws. Step 7: Put the blade disc and the lid back on and screw in the three marked screws. |
Change the blade disc on Husqvarna Automower 320, 330X, 420, 430X, 440 and 450X
Here is a step by step guide of how to disassemble and replace the blade disc on the Husqvarna Automower 320, 330X, 420, 430X, 440 and 450X.
A cracked or damaged blade disc causes an imbalance in the cutting system, resulting in missing blades or noise from the robotic lawnmower. Another common fault is that a threaded insert for a blade on the disc has come loose.
Changing the blade disc is a simple process and doesn't require any special tools. See below for step by step instructions.
At the bottom of the page there is a list of the spare parts needed for the job.
Tools we use: Torx screwdriver T20, Allen key size 5.
.jpg) Step 1: Turn your Automower over. Unscrew the three screws. Step 1: Turn your Automower over. Unscrew the three screws. |
.jpg) Step 2: Lift off the skid plate and its cover. Unscrew the marked centre screw with an allen key. Hold the blade disc in place so it doesn't rotate. Step 2: Lift off the skid plate and its cover. Unscrew the marked centre screw with an allen key. Hold the blade disc in place so it doesn't rotate. |
.jpg) Step 3: Lift off the skid plate and its cover. Unscrew the marked centre screw with an allen key. Hold the blade disc in place so it doesn't rotate. |
.jpg) Step 4: Lift up the blade disc to loosen it from the lawnmower engine's axle . Carefully fit the new blade disc onto the blades before putting it back on the shaft. |
.jpg) Step 5: Screw in the three marked screws holding the blade disc. |
.jpg) Step 6: Put the bearing holder back and screw in the centre screw. Step 6: Put the bearing holder back and screw in the centre screw. |
.jpg) Step 7: Put the blade disc and the lid back on and screw in the three marked screws. Step 7: Put the blade disc and the lid back on and screw in the three marked screws. |


 Help center is a digital DIY manual for Husqvarna Automower robotic lawnmower. We teach you how to change batteries, circuitboards and other spare parts on your Husqvarna Automower.