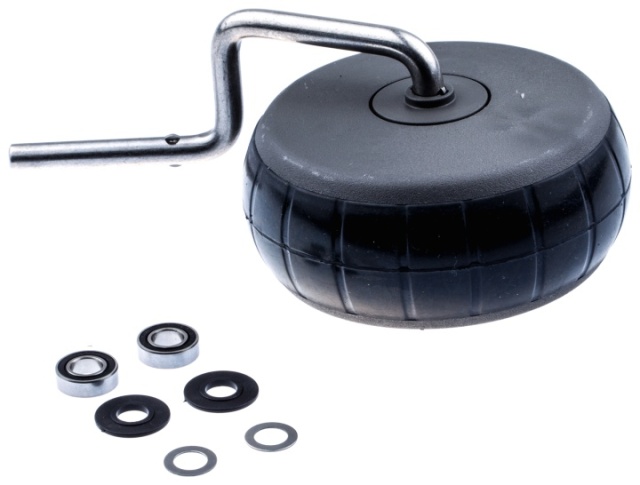
Replace front wheel incl axle and bearings for Automower 320, 330X, 420, 430X, 440 and 450X
In this guide we will show you step-by-step how to change the front wheel incl axle and bearings for your Automower 420. The same procedure applies to Automower 320, 330X, 430X, 440 and 450X.
On the bottom of this page you will find the correct OEM spare parts that we use for this replacement.
Required tools: Torx screwdriver T20, mini flat head screwdriver, socket size 12 and a rubber hammer.
-(1).jpg) Step 1: Turn your Automower upside-down and disconnect the charging contacts. | .jpg) Step 2: Remove the chassis. You do this by pulling the chassis upwards with one hand while keeping the Automower in place with your other hand. Step 2: Remove the chassis. You do this by pulling the chassis upwards with one hand while keeping the Automower in place with your other hand. |
-(1).jpg) Step 3: Unscrew all of the Torx screws as the image above shows. A total of 14pcs. | .jpg) Step 4: Lift off the upper part of the body and disconnect the white flat-cable that is connected to the motherboard. |
.jpg) Step 5: Locate the starlock-washer that holds the front wheel axle. | .jpg) Step 6: Use a mini flat head screwdriver to remove the starlock-washer. Use a rubber hammer to get the screwdriver underneath the washer and pry it off. |
.jpg) Step 7: Remove the axle from the lower chassis by pressing it down with your fingers or use a rubber hammer and gently hit it so it comes loose. | .jpg) Step 8: Remove the old bearings from the lower chassis. |
.jpg) Step 9: Take out your new front wheel kit incl axle and bearings. | .jpg) Step 10: Fit one metal washer, one plastic washer and a bearing onto the axle. |
.jpg) Step 11: Install the front axle kit and make sure that the bearing is correctly in place in the lower chassis. | .jpg) Step 12: Install the other bearing from the upper side and place the larger metal washer on top. |
.jpg) Step 13: Put the starlock-washer ontop of the axle. | .jpg) Step 14: Use a rubber hammer and a size 12 socket and hit the starlock-washer to fasten it on the axle. Make sure that the axle is not loose and that the starlock-washer is fastened properly. |
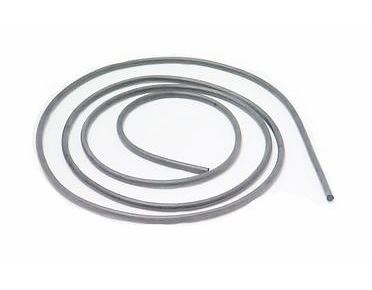
.jpg) Step 15: Get the upper chassis and connect the white flat-cable from the upper body to the motherboard. Note! It's important to replace the lower chassis sealing strip. | -(1).jpg) Step 15: Tighten all 14 Torx screws around the upper body. |
-(1).jpg) Step 16: Re-install the chassis and finally connect the charging contacts. Step 16: Re-install the chassis and finally connect the charging contacts. |
Replace front wheel incl axle and bearings for Automower 320, 330X, 420, 430X, 440 and 450X
In this guide we will show you step-by-step how to change the front wheel incl axle and bearings for your Automower 420. The same procedure applies to Automower 320, 330X, 430X, 440 and 450X.
On the bottom of this page you will find the correct OEM spare parts that we use for this replacement.
Required tools: Torx screwdriver T20, mini flat head screwdriver, socket size 12 and a rubber hammer.
-(1).jpg) Step 1: Turn your Automower upside-down and disconnect the charging contacts. Step 1: Turn your Automower upside-down and disconnect the charging contacts. |
.jpg) Step 2: Remove the chassis. You do this by pulling the chassis upwards with one hand while keeping the Automower in place with your other hand. Step 2: Remove the chassis. You do this by pulling the chassis upwards with one hand while keeping the Automower in place with your other hand. |
-(1).jpg) Step 3: Unscrew all of the Torx screws as the image above shows. A total of 14pcs. |
.jpg) Step 4: Lift off the upper part of the body and disconnect the white flat-cable that is connected to the motherboard. |
.jpg) Step 5: Locate the starlock-washer that holds the front wheel axle. |
.jpg) Step 6: Use a mini flat head screwdriver to remove the starlock-washer. Use a rubber hammer to get the screwdriver underneath the washer and pry it off. |
.jpg) Step 7: Remove the axle from the lower chassis by pressing it down with your fingers or use a rubber hammer and gently hit it so it comes loose. |
.jpg) Step 8: Remove the old bearings from the lower chassis. |
.jpg) Step 9: Take out your new front wheel kit incl axle and bearings. |
.jpg) Step 10: Fit one metal washer, one plastic washer and a bearing onto the axle. |
.jpg) Step 11: Install the front axle kit and make sure that the bearing is correctly in place in the lower chassis. |
.jpg) Step 12: Install the other bearing from the upper side and place the larger metal washer on top. |
.jpg) Step 13: Put the starlock-washer ontop of the axle. |
.jpg) Step 14: Use a rubber hammer and a size 12 socket and hit the starlock-washer to fasten it on the axle. Make sure that the axle is not loose and that the starlock-washer is fastened properly. |
.jpg) Step 15: Get the upper chassis and connect the white flat-cable from the upper body to the motherboard. Note! It's important to replace the lower chassis sealing strip. |
-(1).jpg) Step 15: Tighten all 14 Torx screws around the upper body. |
-(1).jpg) Step 16: Re-install the chassis and finally connect the charging contacts. Step 16: Re-install the chassis and finally connect the charging contacts. |

 Sweden - SEK

 Help center is a digital DIY manual for Husqvarna Automower robotic lawnmower. We teach you how to change batteries, circuitboards and other spare parts on your Husqvarna Automower.