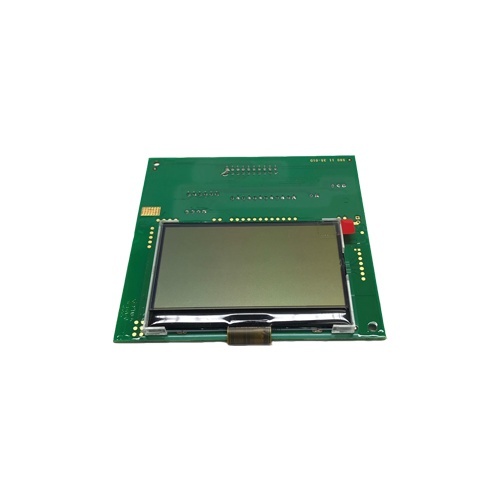
Here we go through step by step on how to disassemble and replace the display circuit board on the Husqvarna Automower G3 (320, 330X, 420, 430X, 440, 450X).
The display may need to be replaced if it has been damaged by water, if the keyboard is no longer responsive or if it has been damaged for any other reason.
Please note! In this guide we will show you how to replace the circuit board yourself. However, the robot must be returned for programming after the display has been replaced.
Tools we use: Torx screwdriver T20.
-(1).jpg) Step 1: Turn your Automower over and disconnect the charging cable. First remove the rubber cap; then disassemble the charging connector. Step 1: Turn your Automower over and disconnect the charging cable. First remove the rubber cap; then disassemble the charging connector. | .jpg) Step 2: Loosen the body. To do this, hold as shown and use your right hand to pull the body upwards. It is attached by two points at the rear and two points at the front. Step 2: Loosen the body. To do this, hold as shown and use your right hand to pull the body upwards. It is attached by two points at the rear and two points at the front. |
-(1).jpg) Step 3: Unscrew all the screws around the body. 14 in total. | .jpg) Step 4: Lift up the top of the body. Disconnect the long flat white connector that goes to the motherboard according to the yellow marking. Then put the bottom of the body to one side. |
.jpg) Step 5: Disconnect all connections from the display circuit board. Then loosen the four marked screws. | .jpg) Step 6: Once you have loosened the screws, turn the cover over. |
.jpg) Step 7: Gently grasp the stop button and jerk to the right. The cover that holds the display board will now come off. | .jpg) Step 8: Before proceeding, remove the old seal and install a new one. |
.jpg) Step 9: Gently push the plastic holders aside to release the display circuit board. Marked in the picture. | .jpg) Step 10: Remove the old display. |
.jpg) Step 11: Insert the new display, making sure it hooks into the plastic holders and that it is firmly in place. | .jpg) Step 12: Insert the cover, making sure it clicks into place and is secure. |
.jpg) Step 13: Replace all the connectors and tighten the four screws. | .jpg) Step 14: Remove the lower part of the body and connect the connector from the top to the motherboard as marked. Also take the opportunity to replace the sealing strip for the undercarriage. |
-(1).jpg) Step 15: Screw all 14 screws back into the body. | -(1).jpg) Step 16: Attach the body to the robot by placing it on all four points. Finally, plug in the charging cable and push the rubber plug back into the bottom of the body. Step 16: Attach the body to the robot by placing it on all four points. Finally, plug in the charging cable and push the rubber plug back into the bottom of the body. |
After the display is replaced, the robot must be reprogrammed by an authorised service workshop to ensure proper function.
Here we go through step by step on how to disassemble and replace the display circuit board on the Husqvarna Automower G3 (320, 330X, 420, 430X, 440, 450X).
The display may need to be replaced if it has been damaged by water, if the keyboard is no longer responsive or if it has been damaged for any other reason.
Please note! In this guide we will show you how to replace the circuit board yourself. However, the robot must be returned for programming after the display has been replaced.
Tools we use: Torx screwdriver T20.
-(1).jpg) Step 1: Turn your Automower over and disconnect the charging cable. First remove the rubber cap; then disassemble the charging connector. Step 1: Turn your Automower over and disconnect the charging cable. First remove the rubber cap; then disassemble the charging connector. |
.jpg) Step 2: Loosen the body. To do this, hold as shown and use your right hand to pull the body upwards. It is attached by two points at the rear and two points at the front. Step 2: Loosen the body. To do this, hold as shown and use your right hand to pull the body upwards. It is attached by two points at the rear and two points at the front. |
-(1).jpg) Step 3: Unscrew all the screws around the body. 14 in total. |
.jpg) Step 4: Lift up the top of the body. Disconnect the long flat white connector that goes to the motherboard according to the yellow marking. Then put the bottom of the body to one side. |
.jpg) Step 5: Disconnect all connections from the display circuit board. Then loosen the four marked screws. |
.jpg) Step 6: Once you have loosened the screws, turn the cover over. |
.jpg) Step 7: Gently grasp the stop button and jerk to the right. The cover that holds the display board will now come off. |
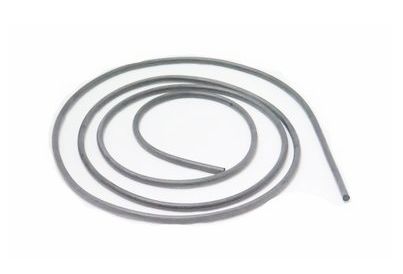
.jpg) Step 8: Before proceeding, remove the old seal and install a new one. |
.jpg) Step 9: Gently push the plastic holders aside to release the display circuit board. Marked in the picture. |
.jpg) Step 10: Remove the old display. |
.jpg) Step 11: Insert the new display, making sure it hooks into the plastic holders and that it is firmly in place. |
.jpg) Step 12: Insert the cover, making sure it clicks into place and is secure. |
.jpg) Step 13: Insert the cover, making sure it clicks into place and is secure. |
.jpg) Step 14: Remove the lower part of the body and connect the connector from the top to the motherboard as marked. Also take the opportunity to replace the sealing strip for the undercarriage. |
-(1).jpg) Step 15: Screw all 14 screws back into the body. |
-(1).jpg) Step 16: Attach the body to the robot by placing it on all four points. Finally, plug in the charging cable and push the rubber plug back into the bottom of the body. Step 16: Attach the body to the robot by placing it on all four points. Finally, plug in the charging cable and push the rubber plug back into the bottom of the body. |
After the display is replaced, the robot must be reprogrammed by an authorised service workshop to ensure proper function.


 Help center is a digital DIY manual for Husqvarna Automower robotic lawnmower. We teach you how to change batteries, circuitboards and other spare parts on your Husqvarna Automower.