 Austria - EUR
 Belgium - EUR
 Bulgaria - EUR
 Cyprus - EUR
 Czech Republic - EUR
 Estonia - EUR
 Greece - EUR
 Hungary - EUR
 UK - GBP
 Ireland - EUR
 Latvia - EUR
 Lithuania - EUR
 Luxembourg - EUR
 Malta - EUR
 Netherlands - EUR
 Norway - NOK
 Portugal - EUR
 Romania - EUR
 Slovakia - EUR
 Slovenia - EUR
 Switzerland - EUR
Replace the drive wheel on your Husqvarna Automower 105/305/308
Here we outline how to change the drive wheel on the Husqvarna Automower 105/305/308. The same principles apply to several of the Gardena robotic lawnmowers.
The drive wheels will wear out as the robot mows your lawn. Eventually, the robotic mower loses grip and can get stuck on slopes or hills. This usually happens when it's wet outside and the lawn gets slippery. Therefore, it may be a good idea to check the drive wheels and replace them if necessary.
How often should they be changed?
How often you will have to change the running wheels will vary. If your robotic lawnmower is getting stuck and the grooves on the drive wheels are worn, it's a clear sign that a new pair of drive wheels is needed to give the robot the grip it needs.
No special tools are required to change the drive wheels on your Automower. Below is our step by step process.
Tools we will need: A Torx screwdriver T20, a small flathead screwdriver.
.jpg) Step 1: Place the robotic lawnmower vertically. Step 1: Place the robotic lawnmower vertically. | .jpg) Step 2: Use a small flathead screwdriver or other flat object to push in the hooks to release the hubcap. Step 2: Use a small flathead screwdriver or other flat object to push in the hooks to release the hubcap. |
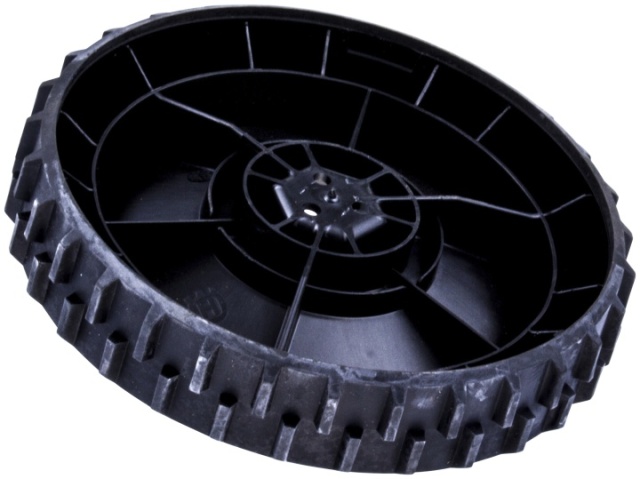
.jpg) Step 3: Remove the hubcap from the wheel. | .jpg) Step 4: Loosen the three screws holding the wheel as marked. |
.jpg) Step 5: Lift the wheel off the shaft of the drive motor. |
|
| Step 7: Refit the hubcap and make sure the three hooks are securely fastened. |
|
Tip! Apply liquid thread locker to the drive wheel bolts to prevent them from unscrewing during operation.
Replace the drive wheel on your Husqvarna Automower 105/305/308
Here we outline how to change the drive wheel on the Husqvarna Automower 105/305/308. The same principles apply to several of the Gardena robotic lawnmowers.
The drive wheels will wear out as the robot mows your lawn. Eventually, the robotic mower loses grip and can get stuck on slopes or hills. This usually happens when it's wet outside and the lawn gets slippery. Therefore, it may be a good idea to check the drive wheels and replace them if necessary.
How often should they be changed?
How often you will have to change the running wheels will vary. If your robotic lawnmower is getting stuck and the grooves on the drive wheels are worn, it's a clear sign that a new pair of drive wheels is needed to give the robot the grip it needs.
No special tools are required to change the drive wheels on your Automower. Below is our step by step process.
Tools we will need: A Torx screwdriver T20, a small flathead screwdriver.
| Step 1: Place the robotic lawnmower vertically. |
| Step 2: Use a small flathead screwdriver or other flat object to push in the hooks to release the hubcap. |
Step 3: Remove the hubcap from the wheel. |
Step 4: Loosen the three screws holding the wheel as marked. |
Step 5: Lift the wheel off the shaft of the drive motor. |
|
|
| Step 7: Refit the hubcap and make sure the three hooks are securely fastened. |
Tip! Apply liquid thread locker to the drive wheel bolts to prevent them from unscrewing during operation.
Spare parts used
 Help center is a digital DIY manual for Husqvarna Automower robotic lawnmower. We teach you how to change batteries, circuitboards and other spare parts on your Husqvarna Automower.