 Austria - EUR
 Belgium - EUR
 Bulgaria - EUR
 Cyprus - EUR
 Czech Republic - EUR
 Estonia - EUR
 Greece - EUR
 Hungary - EUR
 UK - GBP
 Ireland - EUR
 Latvia - EUR
 Lithuania - EUR
 Luxembourg - EUR
 Malta - EUR
 Netherlands - EUR
 Norway - NOK
 Portugal - EUR
 Romania - EUR
 Slovakia - EUR
 Slovenia - EUR
 Switzerland - EUR
Replacing the loop sensor on the Husqvarna Automower 220AC/230ACX
Here we go step by step through how to disassemble and replace the loop sensor on Husqvarna Automower 220AC. The same steps apply for the 230ACX.
A malfunctioning loop sensor may give the error message "Front loop sensor defective" or "Rear loop sensor defective". The error can also be indicated by the error message "No loop signal".
Replacing the circuit boards of the loop sensors is a simple operation and does not require any special tools. Below we go through a step by step guide on how to go about it!
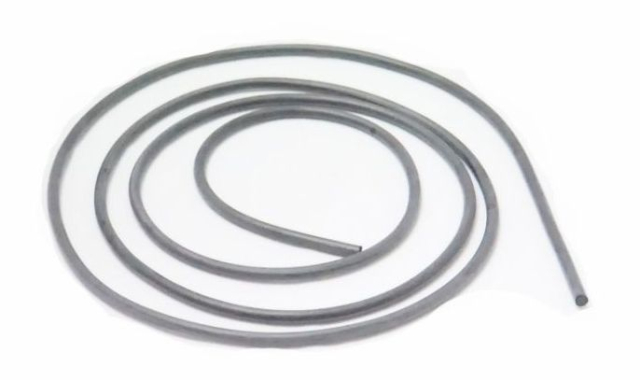
At the bottom of the page there is a list of the spare parts needed for the job.
.jpg) Step 1: Turn your Automower over and disconnect the charging cable. First remove the rubber cap; then disassemble the charging connector. Step 1: Turn your Automower over and disconnect the charging cable. First remove the rubber cap; then disassemble the charging connector. | .jpg) Step 2: Loosen the screws on the chassis. On the Automower 220AC and 230ACX the chassis is secured with four screws in total. Two at the rear and two under the flap for the cutting height adjustment. Step 2: Loosen the screws on the chassis. On the Automower 220AC and 230ACX the chassis is secured with four screws in total. Two at the rear and two under the flap for the cutting height adjustment. |
.jpg) Step 3: Remove the clip that holds the microswitch. Then lift the chassis off the robot. Note! Be careful not to remove the locking washers located on top of the two lift sensors at the front of the robot. | .jpg) Step 4: Unscrew all screws around the chassis as marked. A total of 16. |
.jpg) Step 5: Lift the upper chassis and remove the sealing strip located in the groove along the lower chassis half. | .jpg) Step 6: Disconnect the main cable harness connector from the motherboard as marked in the picture. Set the upper chassis aside. |
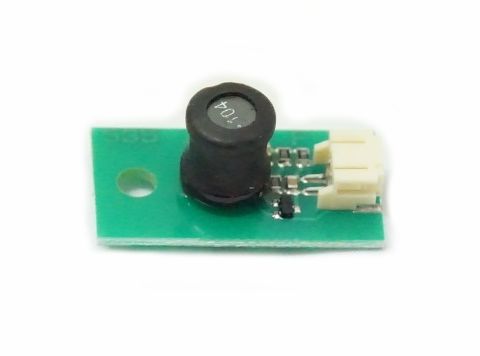
.jpg) Step 7: In the picture, the front and rear loop sensors are marked. Disconnect the connector of the circuit board that is being replaced, then loosen the screw. Insert the new circuit board and replace the connector and screw. | Step 8: Put a new sealing strip in the lower half of the chassis. Plug in the main cable harness and replace the upper chassis. |
Step 9: Screw all of the 16 screws around the chassis. | .jpg) Step 10: Now put the upper chassis back on. Insert the microswitch through the hole and replace it with the clamp. Make sure to replace the lock washers on the respective lift sensors; otherwise there is a risk that the lift sensors will turn and generate the error message "mower lifted". The image shows the spiked lock washers. |
.jpg) Step 11: Once the chassis is mounted and screwed in place, turn the mower over and reinsert the charging connector, making sure the rubber plug is firmly in place. |
No programming is required after installing a new loop sensor board. Just use your lawnmower as usual.
Used spare parts
Replacing the loop sensor on the Husqvarna Automower 220AC/230ACX
Here we go step by step through how to disassemble and replace the loop sensor on Husqvarna Automower 220AC. The same steps apply for the 230ACX.
A malfunctioning loop sensor may give the error message "Front loop sensor defective" or "Rear loop sensor defective". The error can also be indicated by the error message "No loop signal".
Replacing the circuit boards of the loop sensors is a simple operation and does not require any special tools. Below we go through a step by step guide on how to go about it!
At the bottom of the page there is a list of the spare parts needed for the job.
Tools we will need: Torx screwdriver T20, Allen key size 5.
| Step 1: Turn your Automower over and disconnect the charging cable. First remove the rubber cap; then disassemble the charging connector. |
| Step 2: Loosen the screws on the chassis. On the Automower 220AC and 230ACX the chassis is secured with four screws in total. Two at the rear and two under the flap for the cutting height adjustment. |
Step 3: Remove the clip that holds the microswitch. Then lift the chassis off the robot. Note! Be careful not to remove the locking washers located on top of the two lift sensors at the front of the robot. |
Step 4: Unscrew all screws around the chassis as marked. A total of 16. |
Step 5: Lift the upper chassis and remove the sealing strip located in the groove along the lower chassis half. |
Step 6: Disconnect the main cable harness connector from the motherboard as marked in the picture. Set the upper chassis aside. |
Step 7: In the picture, the front and rear loop sensors are marked. Disconnect the connector of the circuit board that is being replaced, then loosen the screw. Insert the new circuit board and replace the connector and screw. |
Step 8: Put a new sealing strip in the lower half of the chassis. Plug in the main cable harness and replace the upper chassis. |
Step 9: Screw all of the 16 screws around the chassis. |
Step 10: Now put the upper chassis back on. Insert the microswitch through the hole and replace it with the clamp. Make sure to replace the lock washers on the respective lift sensors; otherwise there is a risk that the lift sensors will turn and generate the error message "mower lifted". The image shows the spiked lock washers. |
Step 11: Once the chassis is mounted and screwed in place, turn the mower over and reinsert the charging connector, making sure the rubber plug is firmly in place. |
No programming is required after installing a new loop sensor board. Just use your lawnmower as usual.
Used spare parts
 Help center is a digital DIY manual for Husqvarna Automower robotic lawnmower. We teach you how to change batteries, circuitboards and other spare parts on your Husqvarna Automower.